Supporting modern https on Windows XP
I managed to get modern SSL/TLS connections working under Windows XP, by running a lightweight Linux VM which strips the TLS headers and re-applies a self-signed certificate:
Much of this guide is adapted from the dockerfile from bitbucket.org/ValdikSS/oldssl-proxy. Thanks ValdikSS!
I recommend using Firefox on Windows XP, it seems to have the best support for the modern web. I’m using Firefox 47.0.2. Download old versions of firefox at ftp.mozilla.org/pub/firefox/releases/.
Install the virtual machine
Install a virtual machine software, such as VMware Workstation v9.0.1 Incl. Keymaker - EMBRACE [deepstatus]. If you want to find a torrent program that works on XP, I recommend Deluge 0.9.09.
For our VM, we’ll use Alpine Linux, as it’s very lightweight and still supports 32-bit CPUs. Download alpine-standard-3.13.2-x86.iso.
In VMware, create a new virtual machine. You can allocate 256mb RAM and a 2GB disk, maybe less.
Configure the machine to use your iso file and boot. Install Alpine by running setup-alpine. Use the default options, but pick sys as the disk partitioning option.
Install and configure squid proxy
We will use Squid to proxy the web connection. Install it:
apk add alpine-sdk squid openssl darkhttpd
/usr/lib/squid/security_file_certgen -c -s /var/cache/squid/ssl_db -M 4MB
chown squid:squid -R /var/cache/squid/ssl_db
mkdir /etc/squid/ssl_cert
Edit the squid configuration. Run these sed commands, or use vi if you’re comfortable with it.
cd /etc/squid/

# Comment out some lines
sed -i 's/http_port 3128/#http_port 3128/' squid.conf
sed -i 's/http_access deny !Safe_ports/#http_access deny !Safe_ports/' squid.conf
sed -i 's/http_access deny CONNECT !SSL_ports/#http_access deny CONNECT !SSL_ports/' squid.conf

# Insert new configuration at the end
echo 'http_port 3128 ssl-bump \' >> squid.conf
echo '    cert=/etc/squid/ssl_cert/myCA.pem \' >> squid.conf
echo '    cipher=HIGH:MEDIUM:!LOW:!aNULL:!eNULL:!MD5:!EXP:!PSK:!SRP:!DSS \' >> squid.conf
echo '    options=NO_TICKET,ALL \' >> squid.conf
echo '    generate-host-certificates=on dynamic_cert_mem_cache_size=4MB' >> squid.conf
echo '' >> squid.conf
echo 'visible_hostname squid-oldssl-proxy' >> squid.conf
echo 'ssl_bump bump all' >> squid.conf
echo 'tcp_outgoing_address 0.0.0.0' >> squid.conf
echo 'sslproxy_cert_sign_hash sha1' >> squid.conf
We need to generate an old, outdated CAcert, which is no longer supported by OpenSSL. Let’s recompile it with deprecated security enabled. This may take 1-2 hours on older hardware.
adduser user -D -G abuild

su user bash -c 'cd && git clone https://github.com/alpinelinux/aports.git --depth 1'
su user bash -c 'abuild-keygen -a < /dev/null'
cd /home/user/aports/main/openssl/

sed -i 's/no-ssl3/enable-ssl3 enable-ssl3-method/' APKBUILD
sed -i 's/no-weak-ssl-ciphers/enable-weak-ssl-ciphers/' APKBUILD

su user bash -c 'cd /home/user/aports/main/openssl/ && abuild -r
Let’s generate the certificates. 1024 bit RSA keys and SHA-1 signatures are no longer considered secure, but they’re fine for communication between XP and the Linux VM.
cd /etc/squid/ssl_cert
mkdir public
openssl req -new -newkey rsa:1024 -sha1 -days 1825 -nodes -x509 -extensions v3_ca -subj '/C=AU/ST=Some-State/O=OldSSL Proxy' -keyout myCA.pem -out myCA.pem -batch
openssl x509 -in myCA.pem -outform DER -out public/OldSSL.der
openssl x509 -in myCA.pem -outform PEM -out public/OldSSL.crt
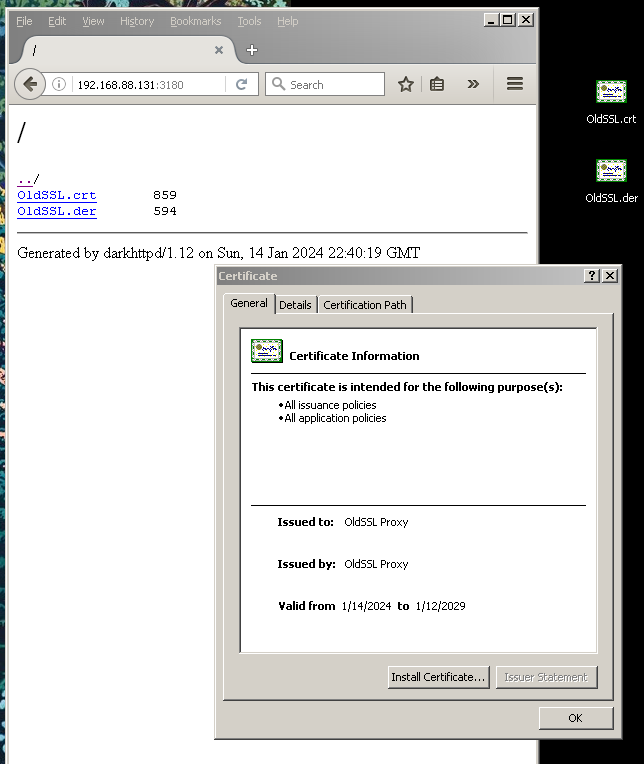
chown squid:squid -R /etc/squid/ssl_cert/Download self-signed certificates
# Get your local IP address. Mine was 192.168.88.131
ip addr
# Run an HTTP server to serve the certificates
darkhttpd /etc/squid/ssl_cert/public/ --port 3180 --daemon
In any browser, navigate to your VM’s IP address at port 3180 and download the certificates. For me, this was http://192.168.88.131:3180. (Use the output of ip addr to figure out your VM’s address.)
Start the proxy service
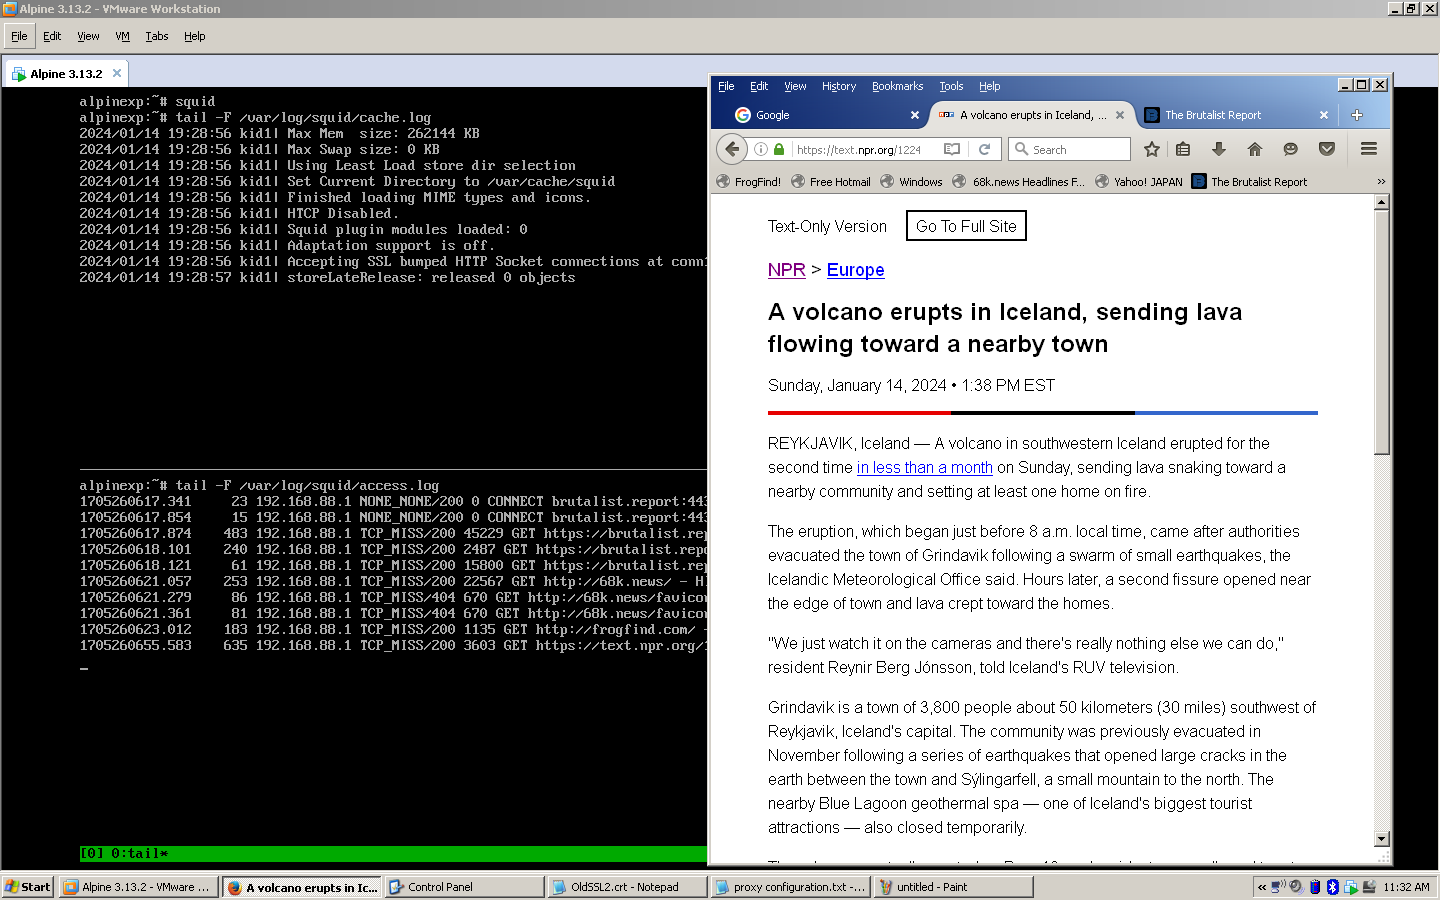
Finally, run squid proxy. If you see any errors, check the log in /var/log/squid/cache.log
squidEnable the service to make squid start automatically with the VM:
rc-update add squid defaultInstall the certificates
Double-click on the .crt file and say yes to the prompts. This adds it to the built-in Windows certificate store.
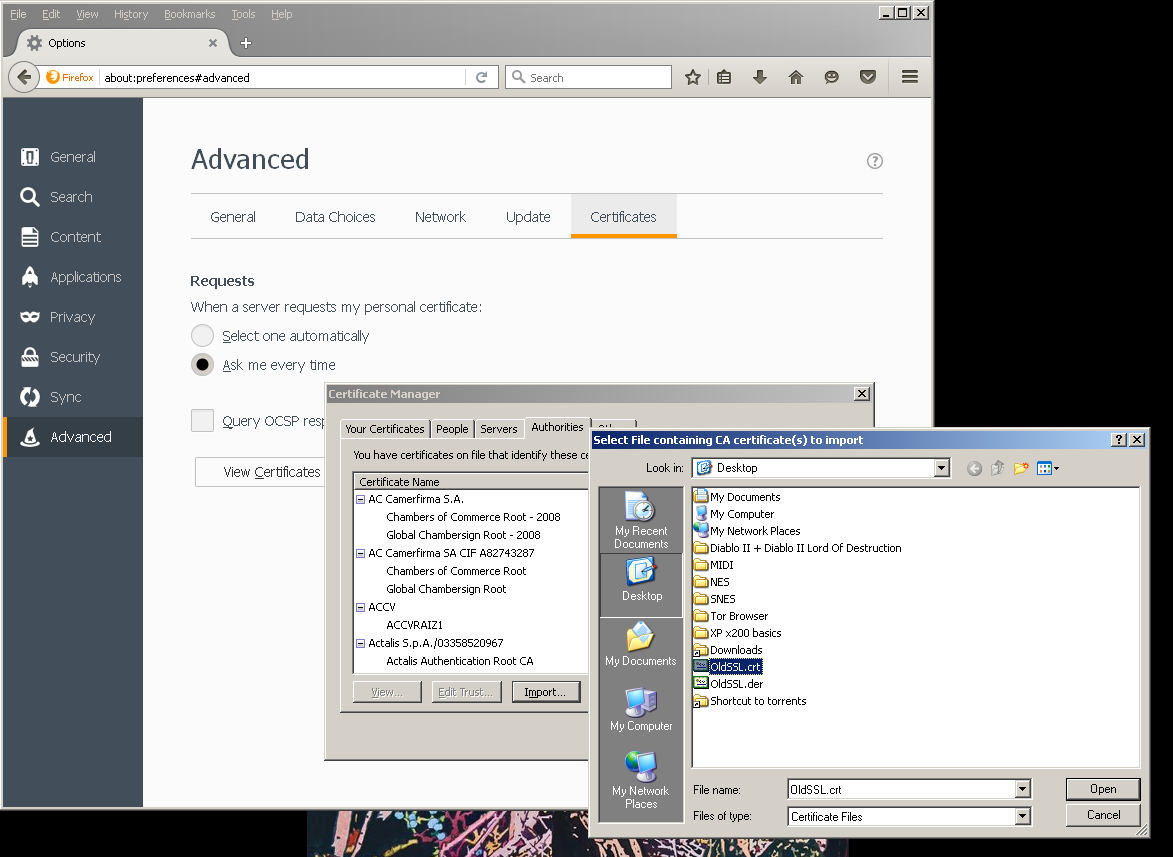
In Firefox, you need to go to Tools > Options > Advanced > Certificates > View Certificates > Authorities > Import and import your .crt file.
Set up the proxy
In Internet Explorer, go to Tools > Internet Options > Connections > LAN Settings. Enter the proxy in the lower box, with the IP address of your VM and the port 3128.
In Firefox, go to Tools > Options > Advanced > Network > Connection Settings. Check “Manual proxy configuration” and enter the IP address of your VM and port 3128.

Conclusion
Everything should now be working! You can check the status of the squid service with rc-service squid status. If you’re having issues, check the logs under /var/log/squid/.